 expert
We may be compensated if you purchase through links on our website. Our team is committed to delivering honest, objective, and independent reviews on home products and services.
More
Project details
Skill
1 out of 5EasyNo masonry skills required
Cost
Estimated Time
A cracked foundation can be a severe issue for homeowners, potentially leading to water infiltration and structural problems if left unaddressed. Fortunately, many foundation cracks can be repaired with the right tools and techniques. This comprehensive guide will walk you through fixing a crack in a concrete foundation, from preparation to finishing touches.
*Unless otherwise noted, costs in this article reflect an average of prices that our team found from hardware stores like Lowes and Home Depot, and on Amazon.com.
Understanding Foundation Cracks
Foundation cracks can occur for various reasons, including settling, soil pressure, and temperature fluctuations. While not all cracks are cause for alarm, it’s essential to address them promptly to prevent further damage.
Types of Foundation Cracks
There are several types of foundation cracks, each with different implications:
- Vertical cracks: Often caused by settling and generally less serious
- Horizontal cracks: May indicate significant structural issues due to soil or water pressure
- Diagonal cracks: Can be caused by uneven settling or soil pressure, often seen in areas with expansive soils
- Stair-step cracks: Common in block foundations and may indicate moisture problems or differential settling
Evaluating the Severity of Cracks
Understanding the seriousness of the crack is crucial for determining the appropriate course of action. Minor cracks may only require simple repairs, while more severe cracks can necessitate professional assessment:
- Minor cracks: Less than 1/4 inch in width without signs of water leaks
- Moderate cracks: Greater than 1/4 inch, possibly with water seepage or affecting multiple areas
- Severe cracks: Cracks accompanied by significant wall movement or structural changes
When To Seek Professional Help
While many foundation cracks can be repaired by homeowners, some situations require professional intervention:
- Cracks wider than 1/4 inch
- Cracks that are actively leaking water
- Multiple cracks or signs of shifting walls
- Cracks accompanied by bowing or bulging walls
If you are uncertain about the severity of a crack, consult a structural engineer or foundation specialist.
Preparing for the Foundation Repair
Gather the necessary tools and materials before beginning the repair process. Proper preparation will ensure a smoother, more effective repair.
Tools and Materials Needed
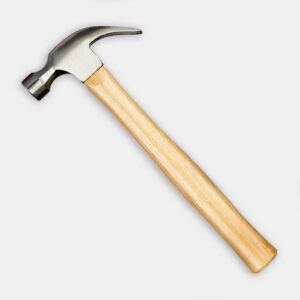
- Cold chisel (5/8-inch)
- Hammer
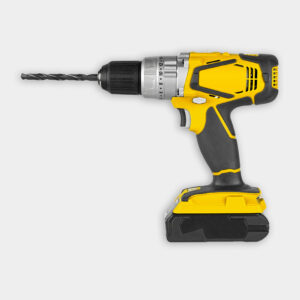
- Drill/driver with mixing paddle
- Margin trowel
- Flat trowel
- Triple-expanding foam insulation
- Mortar mix
- Acrylic bonding agent
- 5-gallon bucket
- Sponge
- Water
- Safety glasses and work gloves
Safety Precautions
When working on foundation repairs, safety should be your top priority:
- Wear safety glasses to protect your eyes from debris
- Use work gloves to prevent cuts and abrasions
- Ensure proper ventilation when using foam insulation
- Follow manufacturer instructions for all products used
- Secure your workspace to prevent accidents with tools and materials
Step-By-Step Foundation Crack Repair Process
Repairing a crack in a concrete foundation involves several steps. The approach and techniques we discuss will give you the confidence to tackle this project and safeguard your home’s structural integrity. Follow this process carefully to ensure a durable and effective repair.
1. Fill the Void
Begin by addressing any voids within the concrete block:
- Hold the can of triple-expanding foam insulation upside down.
- Insert the nozzle into the void, being careful not to overfill.
- Allow the foam to cure for about 10 minutes.
Filling the center of the block is required to provide a stable backing for your mortar repair. Avoid letting the foam overflow into the mortar joint.
2. Widen the Crack
To ensure the repair mortar adheres properly, you’ll need to widen the crack:
- Use a hammer and cold chisel to carefully widen the crack on both the interior and exterior walls.
- Clean out any loose debris from the widened crack.
- Aim for a width of about 1/4 inch to 3/8 inch for optimal mortar adhesion.
Widening the crack allows the repair material to adhere better, delivering a strong fix.
3. Mix the Mortar
Proper mortar consistency is crucial for a lasting repair:
- In a 5-gallon bucket, mix mortar and water according to the manufacturer’s instructions.
- Use a drill with a mixing paddle to ensure thorough blending.
- Add an acrylic bonding agent to the mixture for improved adhesion.
A well-mixed mortar will deliver better results and last longer once cured.
4. Prepare the Surface
Before applying the mortar, prepare the crack and surrounding area:
- Use a margin trowel to remove any excess cured foam.
- Push any remaining foam back into the wall.
- Dampen the crack and surrounding area with a wet sponge to prevent the wall from drawing moisture out of the mortar too quickly.
Proper surface preparation is critical for achieving strong adhesion.
5. Apply the Mortar
Now you’re ready to fill the crack with mortar:
- Use a margin trowel to force mortar into the crack on both interior and exterior surfaces.
- Ensure the mortar is packed tightly, filling the entire depth of the crack.
- Smooth the surface with a flat trowel, making it level with the surrounding wall.
Proper application will result in a smooth and durable finish.
6. Finishing Touches
To create a seamless repair:
- Allow the mortar to set for about 15 minutes.
- Lightly scrub the mortared surface with a damp sponge to create a textured finish that matches the surrounding wall.
- Let the mortar cure for two weeks before painting, if desired.
The textured finish helps blend the repair with the existing wall, ensuring a cohesive appearance.
Preventing Future Foundation Cracks
While some foundation movement is normal, there are steps you can take to minimize the risk of future cracks:
- Maintain proper drainage around your home’s foundation to reduce water pressure
- Control vegetation growth near your foundation to prevent root intrusion
- Inspect plumbing systems to catch any leaks that could undermine the foundation
- Ensure consistent soil moisture levels around the foundation
- Install water management systems like a French drain if necessary
Regular foundation inspections can help detect and address issues before they escalate, preserving your home’s integrity.
Our Conclusion
Many homeowners find repairing a crack in a concrete foundation a manageable DIY project. By following the steps outlined in this guide, you can seal foundation cracks effectively and prevent water infiltration. However, severe or multiple cracks may require professional assessment and repair. Taking action promptly not only protects your home but also provides peace of mind.
Learn more: Foundation Repair Cost
Tools
 5/8-inch cold chisel
- Hammer
- Drill/driver
- Mixing paddle
- Margin trowel
- Flat trowel


Source: https://www.thisoldhouse.com/foundations/21017075/how-to-repair-a-crack-in-a-concrete-foundation
You may also like

