 expert
We may be compensated if you purchase through links on our website. Our team is committed to delivering honest, objective, and independent reviews on home products and services.
More
Project details
Skill
3 out of 5ModerateThis project requires some specialized tools and DIY know-how.
Cost
Estimated Time
Brick can last for hundreds of years, but over time, weathering can deteriorate the mortar, causing cracks and gaps that allow moisture to penetrate the wall. If ignored, this can lead to more severe damage to your home.
Repointing is an easy way to restore the mortar, helping to prevent structural water damage, enhance the brickwork’s appearance, and even improve your home’s energy efficiency. Most homeowners can repoint brick themselves with a few hand tools, though we recommend hiring professionals for large-scale or historically significant buildings to preserve their integrity. In the video above, mason Mark McCullough demonstrates the techniques and tools needed to successfully repoint brick.
Signs Your Brick Needs Repointing
Before beginning the repointing process, it’s helpful to recognize when your brickwork requires attention. Look for the following indicators:
- Crumbling or missing mortar
- Loose bricks
- Visible cracks in the mortar joints
- Water stains or efflorescence on the brick surface
Tools and Materials Needed to Repoint Your Brick
To repoint brick using hand tools, you’ll need the following items. Invest in durable chisels and trowels for better control and precision.
- Brick hammer
- Bucket
- Cleanout tool
- Finishing trowel
- Jointing tool
- Margin trowel
- Paintbrush
- Pointed trowel
- Pointing chisel
- Premixed mortar (color-matched to existing mortar)
- Water
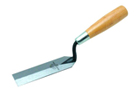
 brick hammer
- Pointing chisel
- Paint brush
- Bucket
- Pointed trowel
- Finishing trowel
- Margin trowel


Step-by-Step Guide to Repointing Brick
Once you’ve gathered your tools, you’re ready to start the repointing process. Depending on how much brick you’re repointing, you can usually finish the job in a few hours. Here’s what to do.
1. Prepare the Work Area
- Inspect the brickwork to identify areas that need repointing
- Clean dirt or debris off the brick surface
- Set up a stable work platform if working at height
- Wear appropriate safety gear, including gloves and safety glasses
2. Remove Old Mortar
- Start with the head joints (vertical joints) before moving to the bed joints (horizontal joints)
- Line the pointing tool up at an angle pointing into the wall, and tap it with the flat head of brick hammer to apply pressure to the loose mortar
- Chisel out the old mortar to an approximate 3/4-inch depth
- Be cautious not to damage the surrounding bricks
- Do the same areas again, this time with a thinner chisel, to remove even more debris
McCullough says to remove the head joints first, as this weakens the bed joints and makes them easier to chisel out.
3. Clean the Joints
- Clear out any loose dust with a clean-out tool and brush.
- Dampen the brush with water and clean the joints again. This dampening process helps the new mortar bond better with the brick.
4. Mix the Mortar
The right mortar consistency is crucial for successful repointing. Here’s how to achieve it:
- Use a premixed mortar that matches the color of your existing mortar
- Add water slowly to the dry mix in a bucket
- Mix with a pointed trowel until you achieve an oatmeal-like consistency
- Avoid making the mixture too wet, as this can weaken the mortar
5. Apply the New Mortar
Now comes the most important step. Before applying the fresh mortar, roll a small amount between your fingers. It should hold its shape without crumbling or becoming too watery. Then, do the following:
- Place a small amount of mortar on your finishing trowel
- Hold the trowel up to the now-clean joint and use the jointing tool to push the mortar into the opening
- Work the mortar deep into the joint, creating full coverage
- Stay off the edge of the brick. The new mortar shouldn’t be flush with the wall
- Avoid getting mortar on the bricks’ face
- Fill all joints, starting with the head joints and then moving to the bed joints
When pushing mortar into the joints, make sure there are no air pockets, which can weaken the bond. Use a beading technique for uniform application.
6. Finish the Joints
Finally, give the newly pointed joints a clean, professional finish:
- Allow the mortar to set slightly (about 30 minutes to one hour, depending on conditions)
- Use the jointing tool to smooth and shape the mortar to match the existing joint profile
- Brush away any excess mortar with a dry brush
- Clean any mortar smears from the brick faces immediately
Common Mistakes To Avoid When Repointing Brick
When repointing brick, be aware of these potential pitfalls:
- Applying new mortar when the bricks are too dry or too wet: Dry bricks can absorb moisture from the fresh mortar too quickly, causing the mortar to set too fast and potentially weaken its bond. Wet bricks can prevent proper adhesion, weakening the mortar’s bond.
- Failing to remove enough old mortar: Failing to get rid of old, deteriorated mortar can prevent the new mortar from properly bonding with the brick, resulting in a weak joint that may fail over time.
- Neglecting to clean mortar smears from brick faces quickly: Mortar smears and stains left can be difficult to remove once they’ve set, marrying your brick’s appearance and making cleaning more challenging. Keep your work surface clean by regularly wiping off excess mortar from your tools and surrounding bricks. This prevents smears and creates a professional finish.
- Overworking the mortar during the finishing stage: Overworking or excessively smoothing the mortar can weaken it and cause it to lose its intended texture, leading to poor durability or appearance.
- Using the wrong mortar mix or color: Using the wrong mix can lead to poor adhesion, cracking, or mismatched expansion rates. To maintain the brickwork’s style and structural integrity, select a mortar mix similar in composition to the old mortar. Historical homes often require lime-based mortar. Similarly, the wrong color will create a visual mismatch that detracts from your home’s appearance.
Caring for Newly Repointed Brick
After repointing, do the following for best results:
- Keep the newly pointed areas moist for the first few days to allow proper curing.
- Protect the work from direct sunlight, wind, and rain for at least a week. Use a tarp or plastic sheeting as protection if needed.
- Avoid pressure washing or harsh cleaning methods for several months.
Long-Term Maintenance
Repointing is just one part of maintaining brick structures. Regular inspections and minor repairs can save time and effort in the long run.
- Annual inspections: Check for any signs of mortar deterioration or brick damage every year. Early detection can prevent the need for more extensive repairs.
- Preventive measures: Minimize moisture exposure with good drainage around the foundation and repair any leaks quickly.
- Regular cleaning: Keep brick surfaces clean by gently washing them with water and a mild detergent. Avoid abrasive cleaners that can erode the mortar.
Energy Efficiency Improvements
Beyond structural benefits, repointing can also improve your home’s energy efficiency. Properly sealed joints prevent drafts and heat loss, increasing indoor comfort and reducing energy bills. Consider adding insulation to walls and attics to complement the repointing work. This helps keep a consistent indoor temperature. You should also check and replace seals around windows and doors to prevent air leakage and keep your home as energy-efficient as possible.
Source: https://www.thisoldhouse.com/masonry/21016125/how-to-repoint-brick-using-only-hand-tools
You may also like

